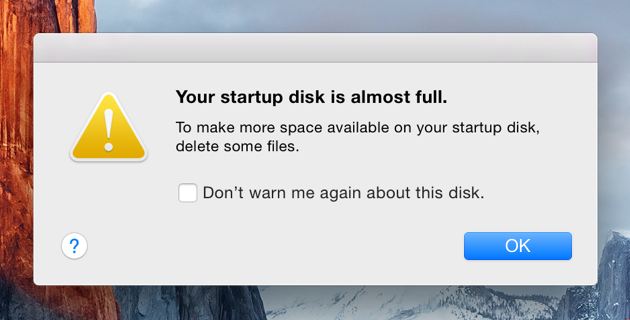
Spotlight search image

HOWTO: Re-Index the Spotlight Index on a Mac

The file search tool Spotlight on Macs is a fast flexible way to find files, except when it isn’t.  Occasionally Spotlight does not find files I know are on my Mac and the index needs to be repaired.  

To force Spotlight to delete an old index and create a new one:

  1. Click the Privacy tab.
  2. Drag the folder or disk that you want to index again to the list of locations that Spotlight is prevented from searching. Or click the Add (+) button and select the folder or disk to add.
  3. Choose Apple menu () > System Preferences, then click Spotlight.
  4. To add an item to the Privacy tab, you must have ownership permissions for that item. To learn about permissions, choose Help from the Finder menu bar, then search for “permissions.”
  5. From the same list of locations, select the folder or disk that you just added. Then click the Remove (–) button to remove it from the list.
  6. Quit System Preferences. Spotlight will reindex the contents of the folder or disk.  This can take a long time.

How to Free Up Space Used By Time Machine’s Local Backups on Your Mac

Time Machine doesn’t just back up to external drives. Enable Time Machine on your MacBook and it will create “local snapshots,” too — potentially taking up over 100 GB of disk space on its internal storage.
These local snapshots appear as “Backups” when you look at the visual overview of storage in the About Your Mac window.CHRIS HOFFMAN has written a good article about  how you can free up that space and get more room on your Mac.

macramupgrade

Boosting Performace of Older Macs

Older MacBook Pro computers made between 2009 and 2012 are routinely retired because they seem slow or will not hold a charge.  These models can have several more useful years with some simple and inexpensive upgrades.  The newer models – like the mid 2012 has a CPU almost as fast as the 2015 models.  Apple has made major improvements in battery life and the beautiful retina display however the perceived speed hasn’t changed much.  If you bought your son or daughter a shiny new Mac when they started college in 2012, that computer, with a few upgrades would be a perfect computer for their high school sibling.  

3 Simple Upgrades for about $250 can save you from buying a new $1,800 Mac.

Number 1   Battery

After four years of frequent use a MacBook Pro battery may need to be replaced.  Symptoms of a bad battery are short operating times after a full charge or erratic battery level readings.  There are several things you can do to get the most out of a new battery but a bad battery needs to be replaced.  There are two approaches to replacing a Mac battery, buy an original Apple battery or buy a third party or OEM battery.  The Apple battery will probably work well and will certainly cost a great deal.  An OEM battery may or may not work well and will cost a lot less.  

Apple stopped making the battery user replaceable around 2009.  To get an original Apple replacement battery that is not  used or new but old, you need to have Apple do the work.

These Mac notebooks have built-in batteries:
MacBook (13-inch, Late 2009) and later 
All MacBook Air computers
All MacBook Pro computers with Retina display
MacBook Pro (13-inch, Mid 2009) and later; MacBook Pro (15-inch, Mid 2009) and later 
 
There are a handful of reputable OEM suppliers of replacement batteries and battery replacement is not difficult.  My preference is to use an OEM battery that has a one year warranty.  These sell for around $40 and if they perform well you will have saved well over $100.  If they have problems you will know within a month or two.  Order a replacement under warranty and try again.  Carefully reading reviews can help find suppliers with a good track record, but no one is perfect.  
 
Sites such as https://www.ifixit.com/ have easy to follow step by step guides. The battery replacement procedure for a mid 2012 MacBook Pro can be found here  (forget the video and just use the photos and instructions). 

Number 2 Memory

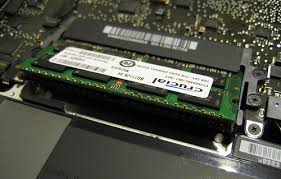
Older MacBook Pros shipped with 2 or 4 GB  (gigabytes) of memory, or RAM.  Software has gotten bigger with more features and people tend to open several applications at once which can really slow down a Mac without enough RAM.  Replacing the memory in a MacBook Pro is very easy and replacing the existing memory with 2  4 GB sticks for 8 GB costs about $40.  13 inch MacBook Pros made in 2010 or later can take up to 16 GB in 2 sticks of 8 GB and costs about $70.  For most high school students, 8 is enough.
 
Crucial.com has an excellent tool on their website to find what type of memory your specific model uses. Crucial memory is available direct or from Amazon and others however be sure to order the exact model if using the Crucial.com tool of make sure the memory is Mac compatible.  

Number 3 Hard Disk or SSD

  • Upgrade your hard disk to a higher performance drive.
  • Upgrade your disk to an SSD.

Most older MacBook Pro laptops shipped with 5400 rpm hard drives.  Switching the old drive ou for a 7200 rpm drive of larger capacity is an an inexpensive upgrade for better performance and capacity.  A 1 TB 7200 rpm drive costs about $70 (8/16/16).  Swapping out drives is relatively easy with step by step instructions at sites such as https://www.ifixit.com.   If you have a larger budget and can make due with less capacity, an SSD drive will provide a substantial performance boost and longer battery life.  The ADATA Premier SP550 480 GB 2.5 Inch SATA III SSD sells for $115 at B&H (8/16/16).

Most of the time to replace these parts is spent removing the back cover so it’s a good idea to do them all at once.  Once your computer is back together you will need to either reinstall the software from your old drive or do a fresh install.  I recommend a fresh install which will provide the latest software and eliminate lots of old software and other junk that accumulates over time.  A fresh install will also improve performance.  For more about how to do a fresh install read my article How to Create an OS/X USB Thumb-Drive Installer.

Questions?  use the contact form to get in touch.


mac-virus-trojan

Protecting Macs from Viruses and Malware

March 11, 2016

For many years, computer viruses and malware were mostly the concern of Windows users.  Mac users faced very few threats. This has been atributed to the Mac’s sibgle digit market share and, some have argued, a more secure product.  One common misconception was that Macs were somehow imune from viruses and malware.  While the number of threats may pale in comparrisln to Windows, Macs are indeed suseptible to attack and more and more are appearing.  The time has come for Mac users to make secutity a priority.   

In the last few weeks, researchers have found the first Mac Ransomware malware in circulation.  Ransomware is software that encrypts the files on a computer making them unuseable to the owner.  The person controllling the malware then demnads a ransom to unencrypt the files.  In most cases, the victim has only 72 hours to pay or the ransom or the malware author threatens to eraswe the key that is needed to restore the files.  Regardless of the size of your business, the loss of data can be davastatiung.  

Add these new threats to hardware failures and theft and the need for a well thought out and executed computer protection plan is more important then ever.

You can find my Mac security recomendations here.


GPG Tools Logo

GPG Suite for Mac – Privacy for People

The GPG Suite for Mac provides everything you need to get started with secure communication and encrypting files in one simple package.  While no longer free unless you compile the code yourself, it is still worth the cost  ($24 per major relase) untill Apple builds encryption into Mac Mail.  
 

Use GPG Suite to encrypt, decrypt, sign and verify files or messages. Manage your GPG Keychain with a few simple clicks and experience the full power of GPG without too much hassle.

One shouldn't need to set up sophisticated encryption tools to protect their private mail, documents and records.  Amendment IV to the U. S,. Constitution reads:

The right of the people to be secure in their persons, houses, papers, and effects, against unreasonable searches and seizures, shall not be violated, and no warrants shall issue, but upon probable cause, supported by oath or affirmation, and particularly describing the place to be searched, and the persons or things to be seized.


osx Archiver icon

A Fix for Mac OSX Archiver Hanging Up -Update

A few years ago I experienced problems with Mac Archiver under Mountain Lion and posted a fix related to permissions.  Today Archiver again would not function and just hung when called.  The following fixed the problem and is much faster.  Start Activity Monitor from the Utilities folder in the Applications folder.  Sort the list alphabetically by process by clicking on the process name column heading.  Find the process “appleeventsd” and click the "force process to quit" button in the upper left of the Activity Monitor window.  The process will return the next time you uncomress a file.

Viewing a winmail.dat Attachment

Problem – you receive an email that has an attachment named winmail.dat that your Mac Mail program can't view.

Reason – The Winmail.dat file is used in Outlook when sending a Rich Text-formatted message however OS/X Mail as the receiving client does not use or recognize the winmail.dat file format.

Solutions

Ask the sender of the email to change their default email settings.  Microsoft suggests 4 methods here.  Then have the sender re-send the attachment.  This is often impractical as it places the burden on the sender who may be someone you don't want to burden.  It also only the solves your problem with this one sender and not the hundreds of millions other of Outlook users. 

There are well established technical standards for email and so it may seem unfair that you are stuck with this problem because Microsoft  chose to use a proprietary format.  Life isn't fair.

   It is faster and more practical to install an add-on to view winmail.dat files on a Mac. I use TNEF's Enough written by Josh Jacob.

  Download the latest version, open the dmg file and drag the program into your applications folder.  If you receive the occasional winmail.dat attachment, save it to your desktop, open TNEFF's Enough and select FILE ->   OPEN, double click on the attachment listed in the TNEFF's Enough program window and select a save location.  If you receive winmail.dat files often, drag the TNEFF app into your dock then drag the winmail.dat file from your email and drop it onto the TNEFF icon in your dock.

 
image of Flycut icon

Flycut – App of the week


Flycut is an example of great software that does one thing well and solves a problem that almost everyone has.  It is a clipboard utility for the Mac that allows for practically limitless number of ‘copy’ items to remain available for paste.  The standard Mac clipboard keeps just one copy item – each subsequent copy replaces it so it’s copy, paste, copy, paste, copy, paste often switching between windows or tabs of a browser each time.  Flycut is a small “resident” program that allows for multiple copy commands to be stored for later pastes in any order.


osx Archiver icon

A Fix for Mac OSX Archiver Hanging Up – Mountain Lion 10.8.2

The Mac Archiver is Apple’s built in archive utility that handles  ZIP archives.  Recently, when I tried to decompress a downloaded ZIP file the Mac Archiver started up and then became         unresponsive.  I found the following solution corrects the problem –

{C}

1) Using Finder, open the Applications folder then the Utilities folder inside the Applications folder.  Run Disk Utility – In the left pane select your system disk – on the right you will see the First Aid tab.  Select REPAIR DISK PERMISSIONS near the bottom. Wait until it finishes.

2) Using Finder click on the GO dropdown menu and select Go to Folder.  Enter ~/Library  – that’s a squiggle forward slash and the word Library (uppercase L).

3) Open the Preferences folder and move the following files to the trash-
com.apple.archiveutility.plist
com.apple.archiveutility.lockfile (may or may not be there)

4) Restart your computer and test it.  Be sure to rstart before running Archiver again.